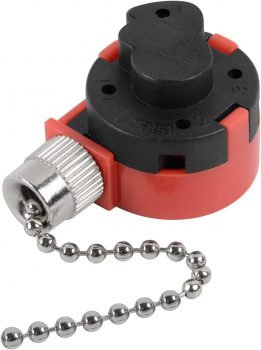
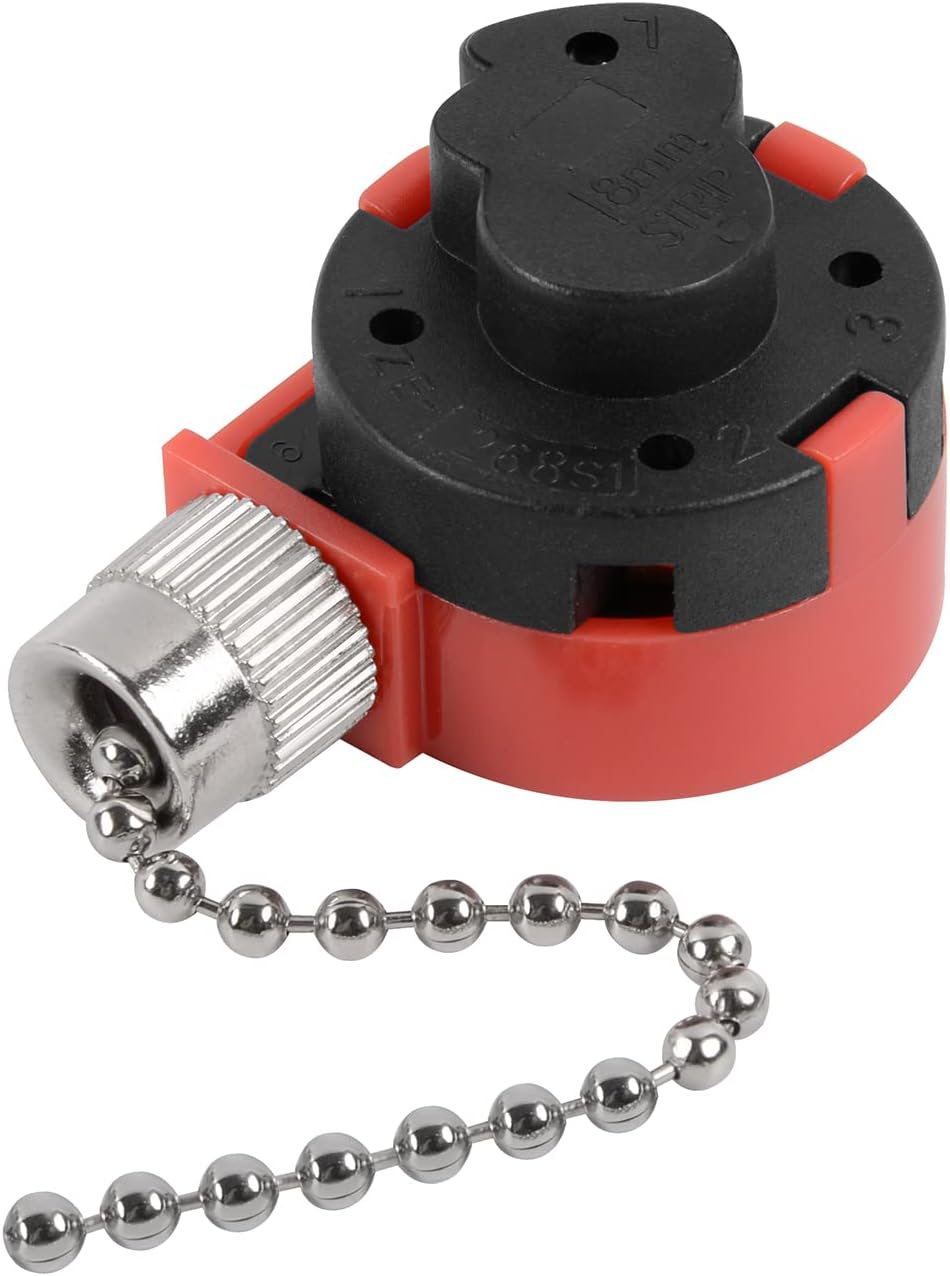
In this article, we delve into the ZE-268S1 Ceiling Fan Switch, an essential replacement part for those looking to restore functionality to their ceiling fans or lamps. With its adjustable speed settings and reliable certifications, understanding its features and benefits will guide you on whether this switch meets your needs.
Product Features
| Feature | Description |
|---|---|
| Product Name | ZE-268S1 Ceiling Fan Switch |
| Brand | Bsentster |
| Electrical Rating | 125V/6A or 250V/3A |
| Functionality | OFF, High, Medium, Low |
| Material | Plastic body with a brass pull chain |
| Dimensions | Approximately 1.5 x 1.5 x 0.75 inches |
| Certifications | UL approved (USA), CSA certified (Canada) |
| Compatibility | Compatible with various ceiling fan brands including Hunter and Harbor Breeze |
| Note | Switch does not include wires; do not discard wires from the original switch |
Product Overview
| Pros |
|---|
| Affordable replacement option for ceiling fans |
| Easy to install for those familiar with wiring |
| Compact size fits most fan housings |
| Reliable speed settings for optimal airflow |
| UL and CSA certified for safety |
| Cons |
|---|
| Instructions for installation may be unclear for beginners |
| Does not include necessary wiring components |
| Limited compatibility with certain fan models |
Understanding the Importance of a Reliable Ceiling Fan Switch
When it comes to the installation of the ZE-268S1 Ceiling Fan Switch, I recommend preparing thoroughly to ensure a smooth process. First off, you’ll need some basic tools: a screwdriver (usually a flathead and Phillips), wire strippers, electrical tape, and possibly a voltage tester for safety. It’s best to work with the power off, so flip the circuit breaker before starting.
Begin by removing the fan’s canopy to access the existing switch. Take note of how the wires are connected to the old switch, as this will be essential when connecting the new ZE-268S1. I usually mark each wire with tape for easy identification later. Carefully disconnect each wire from the old switch and set it aside.
Next, connect the wires to the ZE-268S1 according to the instructions that come with the switch. Typically, I’ve found that matching wire colors usually does the trick. After securing the connections with wire nuts, give each a tug to ensure they’re tight. Once everything is in place, cover it with electrical tape for extra safety.
Before you reassemble the fan, I’d recommend double-checking your connections and testing them with the voltage tester, just to be safe. If everything checks out, carefully reinstall the canopy and restore power to the circuit. I can’t stress enough how important it is to check the switch’s functionality before considering the installation complete. If something doesn’t feel right, I suggest consulting the manual or looking for troubleshooting advice online. By being methodical and cautious, you’ll enhance your confidence and ensure that the new switch performs optimally, making your ceiling fan experience far more enjoyable.
Installation and Usage Tips for the ZE-268S1 Switch
Installing the ZE-268S1 ceiling fan switch can be a straightforward process if you follow the right steps. First, ensure you have the necessary tools: a screwdriver, wire strippers, electrical tape, and safety goggles. It’s crucial to always turn off the power at the circuit breaker to avoid any electrical hazards during installation.
Next, remove the fan’s canopy and locate the existing pull chain switch. Take note of how the wires are connected. This observation will be helpful when attaching the new switch later. Carefully disconnect the old switch, using the wire strippers to prepare the ends of the wires if needed.
When connecting the ZE-268S1, match the wires according to your previous setup. The switch usually has color-coded wires for easier connection. Secure the connections with electrical tape to prevent any accidental disconnections. Once everything is in place, reattach the fan’s canopy.
After installation, turn the power back on and test the switch. If you encounter issues like the fan not responding, double-check your connections. Common troubleshooting tips include ensuring the wires are firmly connected and that the power circuit is functioning correctly.
User experiences have shown that careful attention during installation can greatly enhance the switch’s performance. I recommend keeping the installation area clean and organized to avoid confusion. With these tips, you can confidently install your ZE-268S1 switch, ensuring it operates smoothly and efficiently for your ceiling fan.
Conclusions
Overall, the ZE-268S1 Ceiling Fan Switch by Bsentster presents a solid option for replacing faulty fan or lamp switches. Its easy installation and reliable performance make it a worthwhile investment. However, ensure you have the necessary wiring knowledge before proceeding to replace your switch, as the lack of included wiring could pose challenges for some users.