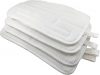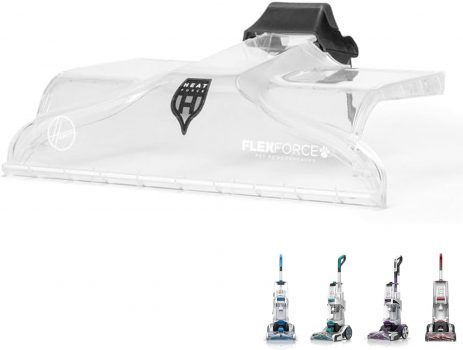

In the world of carpet cleaning, having the right tools can significantly enhance your results. The Upgraded Replacement Front Floor Nozzle Assembly for Hoover is designed to boost the performance of your SmartWash Gen 2 and SmartWash PET models, offering a versatile solution for all carpet types. Dive deeper into how this assembly can transform your cleaning routine.
Product Features
| Feature | Description |
|---|---|
| Versatile Cleaning Solution | Compatible with multiple Hoover models, allowing you to enjoy enhanced cleaning regardless of your specific cleaner. |
| Enhanced Cleaning Efficiency | Engineered for powerful suction to effectively remove dirt and stains from carpets, revitalizing them. |
| Perfect Fit and Compatibility | Designed specifically for SmartWash Gen 2 and SmartWash PET, ensuring a seamless integration and secure attachment. |
| Durable Construction | Crafted with premium materials for long-lasting performance, even with regular use. |
| Easy Installation | User-friendly design allows for hassle-free installation, so you can start cleaning right away. |
Product Overview
| Pros |
|---|
| Compatible with various Hoover models |
| Optimizes carpet cleaning efficiency |
| Durable and long-lasting material |
| Easy to install in minutes |
| Cons |
|---|
| May not fit non-Hoover models |
| Limited to specific Hoover devices |
Understanding the Importance of a Quality Nozzle Assembly
When it comes to enhancing your Hoover SmartWash experience, the installation of the Upgraded Replacement Front Floor Nozzle Assembly is a pivotal step that shouldn’t be overlooked. I remember the first time I replaced mine; the difference it made in cleaning efficiency was astonishing. If you’re looking to breathe new life into your carpet cleaning routine, follow this step-by-step guide to ensure a seamless transition.
First, you’ll want to unplug your carpet cleaner to ensure safety during the installation. Next, remove the old nozzle assembly by firmly grasping it and twisting counterclockwise until it releases. It might take a little effort, but don’t worry—this is a normal part of the process. Once the old nozzle is off, take a moment to inspect the connection points for any debris that might hinder the performance of your new assembly.
Now, it’s time to attach the upgraded nozzle. Align it with the corresponding slots and gently push down until you hear a click, indicating a secure fit. Twist it clockwise to lock it in place. It’s that simple!
After installation, maintaining your nozzle is crucial. Regularly clean the nozzle’s bristles to prevent hair and dirt buildup. If you notice decreased suction or performance, check for clogs in the hose or connections. Remember, proactive maintenance not only prolongs the life of your nozzle but also ensures your Hoover continues to deliver high-quality cleaning. So, if the nozzle starts showing wear and tear or fails to perform, it may be a sign for another replacement. Keep an eye on it, and happy cleaning!
Installing and Maintaining Your Hoover Nozzle Assembly
When it comes to installing your upgraded replacement front floor nozzle assembly onto your Hoover SmartWash models, the process is both straightforward and rewarding. To start, gather the necessary tools: a Phillips screwdriver and the new nozzle assembly. First, unplug your carpet cleaner to ensure your safety during the installation. Next, gently remove the old nozzle by unscrewing the screws holding it in place, taking care to keep them in a secure location for later.
Once the old nozzle is detached, take your new nozzle assembly and align it with the connection point on the cleaner. Firmly attach it using the screws you previously removed, ensuring each screw is tightened securely but not overly so, as this could damage the nozzle. After installation, plug in your carpet cleaner and conduct a brief test run on a small, inconspicuous area of your carpet to ensure everything is functioning correctly.
To maintain peak performance, regularly clean the nozzle after each use. This involves removing any hair, dirt, or debris that may have lodged in the bristles or around the suction ports. If you encounter diminished suction or poor cleaning results, check for clogs in the nozzle or hoses and clear them as needed. Additionally, inspect the nozzle for signs of wear and tear. If the bristles appear frayed or the assembly seems loose, it could be time for a replacement. By following these steps and implementing consistent maintenance, you can enjoy the full benefits of your Hoover carpet cleaner, keeping your carpets fresh and clean for years to come.
Conclusions
In summary, the Upgraded Replacement Front Floor Nozzle Assembly is an essential upgrade for anyone serious about maintaining clean carpets. With its excellent compatibility, durability, and easy installation, this assembly not only enhances cleaning efficiency but also ensures that your carpets remain in top condition for years to come.